
If you've ever wondered how a leather strap is made, you're in the right place! We're here to show you how the Delugs straps made for Armin Strom Dual Time GMT Resonance are handcrafted, from start to finish.

Part 0: Ideation
The Armin Strom team wanted to be more deliberate with the strap pairing to better pair with the watch, and to have two different straps on offer - one strap for a more formal look, and another strap for a casual pairing.
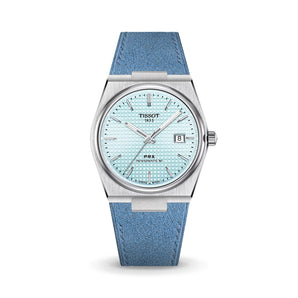
The first strap would be made with the Matte Grey Storm alligator with an alligator flank lining for a more luxurious feel, while the second strap is made with the Light Grey Epsom. Both straps would have highlights in light blue to match with the dials.
Part 1: Leather Selection and Preparation
It all starts with the leather, which is sourced from tanneries around the world. For this project, we’re using alligator from Verdeveleno tannery in Spain, Epsom and Zermatt from Tanneries Haas in France, and Chevre from Alran SAS in France. Each of these leathers and tanneries was chosen for their excellent quality, with more pristine surfaces, a softer and more supple hand feel, and longer durability.

The first step of the crafting process involves cutting out the rough shape and size of the leather needed to make the strap. At this point, the leather is not yet in the final shape of the strap, as the partially completed strap will be further trimmed later on. What is important, however, is the selection of skin used, especially for alligator straps, to ensure that there are no marks or scars on the leather, and that the scales selected are uniform and symmetrical.
Next, the leather heads to the splitting machine. Every piece of leather comes in at a different thickness, and this step ensures that the leather is at the required thickness needed for the strap, and that it is uniform in its thickness.

The logo is then stamped onto the lining of the strap, in this case, on the Matte Astral Blue Alligator Flank and Colibri Chevre. This is done as one of the earliest steps, as stamping of logo after the strap has already been crafted might leave a mark on the front surface of the leather.

Part 2: Assembly and Sizing
The leather is glued and attached with a layer of reinforcement material. This prevents the leather from stretching, and also gives rigidity to materials that can be a little softer.
Next, the ends of the leather pieces (both the lining leather and the main leather, now attached with the reinforcement) are skived down to a feather-thin edge by hand using a blade. Skiving is a skill that is tricky to master, requiring a very sharp blade, a soft but firm grip and consistent pressure, and a perfect angle while guiding the blade through the leather, to ensure that the leather is not cut off prematurely. When done correctly, it ensures that when the main leather and lining leather are glued together, there is a seamless transition.


As these straps are made in the Signature style, a layer of hand-shaped padding is glued on. The padding is made of a thicker veg-tan leather that has been sculpted into the bump profile that tapers in thickness towards the end of the padding. Being made of leather also means that the shape of the padding (and hence the strap) will conform to the shape of the wrist after the strap has been worn in.
After the padding is securely attached onto the lining, the main leather and lining leather is folded over and glued down together, and the leather is pressed together tightly to conform to the padding.

The strap with all the different layers assembled together is then brought to the clicking machine, where the strap will be cut into the precise shape and dimensions of the final strap. A machine is used in this step to ensure accuracy and precision, not just in the dimensions but also in the shape of the strap. Nonetheless, this step still requires an experienced operator to align the die with the strap, to ensure that the padding and logo is centred after the strap has been cut to the right size.

Part 3: Stitching
With the strap starting to take shape, it is now ready to be stitched together. All Delugs straps are stitched by hand with saddle stitching technique, which is slightly more durable than machine stitching.
The first step in hand-stitching is to punch stitching holes along the entire perimeter of the strap, using a tool called the pricking iron. With careful alignment and a solid hammering, the pricking iron punches through the many layers of leather and reinforcement to create slanted holes for the thread to sit in. For a standard 115/70 strap, with a distance between each pricking holes of 2.45mm, a total of 134 holes needs to be punched across both sides of the strap.


The strap is then held between a wooden stitching clamp, which helps to hold onto the leather while our crafter stitches up the strap, with two needles criss-crossing and passing through each of the pricking holes. Care has to be taken in the position at which the needles criss-cross, the angle at which the thread is pulled, and the amount of tension in the thread, all to ensure that the stitches sit consistently. Each strap takes our trained crafters anywhere from 5 to 10 minutes to be stitched.

Saddle stitching in this traditional fashion might be more labour and time intensive compared to machine stitching, but it is more durable as the linen thread creates a knot with each stitch, prevents the thread from unravelling should any single point break. The end result of the stitching pattern is also more pleasing to the eye, with a slanted stitch on both the front and back that’s a signature look of saddle stitching.

Part 4: Edge Finishing
After the strap is stitched up, it is brought to the fileteuse machine with an edge creasing tip. The machine and tip is heated up, and running the tip along the edges of the strap results in a crease line that is formed, between the row of stitches and the edge of the leather. This process helps to flatten the edges of the leather, especially for the alligator flank lining which can be uneven, and also creates a decorative crease line that adds a touch of detail to the strap. The process is repeated for both the front and back of the strap, and additional care is taken when approaching the ogive strap end.


Next begins the edge finishing process. A sealant is first applied to the strap, to seal up the exposed leather edges. After the sealant dries, edge paint in the choice of colour, in this case chosen to match the colour of the leather, is applied over the sealant.


Once the paint dries, it is sanded down and buffed for a smoother surface. This process of applying the edge paint, drying, sanding and buffing is repeated around 2-3 times per strap, until the edge paint is smooth.


Part 5: Strap Keepers
Finally, the two strap keepers (one fixed, and one floating) are attached on. Each keeper is made following the same process – leather and reinforcement are glued together, the leather is cut down to the right size, ends of the leather are skived down, decorative crease line is added, and edges are sealed with paint or folded.

The floating keeper is stitched separately and then looped into the strap first. Attaching the fixed keeper, however, is a little more complicated. The leather has to be slotted through a hole on the sides of the strap, glued and stitched while being attached onto the strap, and then the keeper has to be rotated so that the stitched end resides within the strap and is not exposed.


Part 6: Final Assembly and QC
With all components of the strap assembled and finished, the final few straps include punching the strap holes, notch for the quick release spring bars, and notch for the buckle.


The last step of the crafting process is quality control checks, to ensure that the strap is up to the standards that we expect of all straps crafted by Delugs. This includes ensuring that all of the strap measurements are accurate and that the leather does not have marks or scars, either from the original leather or left behind from the crafting process.

The entire process of crafting a strap from end to end takes between 4 to 6 hours. For such a small item, a strap is actually more challenging to craft than a larger item such as a wallet or a bag, as every measurement needs to be extremely precise and any errors would be noticeable when the strap is mounted onto the watch. Extreme care has to be taken at each step of the crafting process – any mistake would mean that the strap has to be put aside and remade, even if it is almost completed.

![Anthracite Hook Strap [kollokium x Delugs] - Image 2](http://delugs.com/cdn/shop/files/20250919-A7405309_298x298_crop_center.jpg?v=1761299094)
![Delugs Anthracite Hook Strap [kollokium x Delugs] Fabric Watch Strap](http://delugs.com/cdn/shop/files/Kollokium_straps_Anthracite_1_298x298_crop_center.jpg?v=1761299094)