
- View the CTS collections
- Jump straight to the Guide to Cutting the Strap
- Frequently Asked Questions/Troubleshooting
Introduction
If you're reading this, you've most likely purchased a rubber cut-to-size ("CTS") strap, or are considering buying one from us. We would like to take the chance to warmly welcome you to the world of convenience and effortless class!
How it works
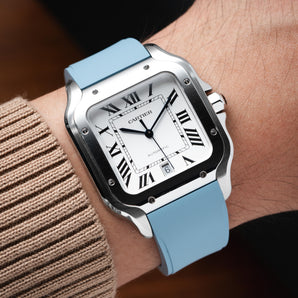
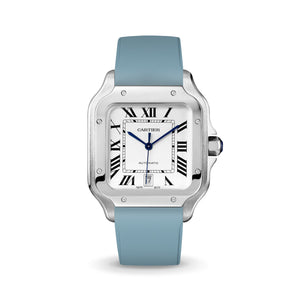
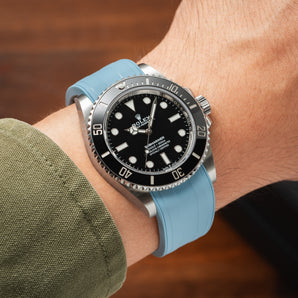
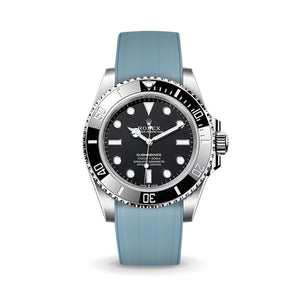
Rubber straps are much like any other straps, and attach to your watch the same way the watch designers intended - whether by an integrated adapter or plain old spring bars.
It is the other end of the strap that we're concerned with, and it is where the magic happens.

The tail end of all CTS straps end similarly - with repeated segments of a cutting groove and spring bar holes. You might be able to guess how this works just at a glance. All you need to do is cut along the groove, and place the spring bar into the last available hole, and install it onto the deployant. It's that easy!
We do understand the fear and trepidation of making a permanent modification to your strap, and that's where this guide comes in.
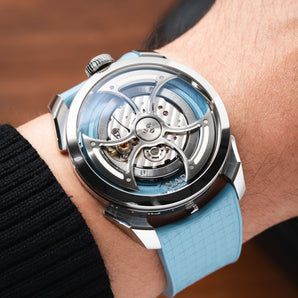
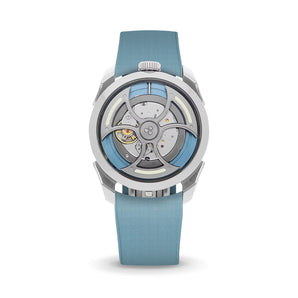
Before we forget, there's one more ingredient to this recipe that can't be missed out - the leaf-spring deployant clasp.

These clasps were designed to perfectly complement both the operation and the look of the CTS Rubber straps. They are operable via a leaf spring mechanism which flips open and shut with satisfying tactile snap.

The new clasp offers additional millimeters of adjustment on both ends of the clasp to let you adjust for a perfect fit for the season.
How to wear?
Different from your run-of-the-mill button-actuated deployants, the leaf spring deployant is secure by design and putting it on is as simple as:
- Pinching one side of clasp closed; then
- Pinching the other side as the subtly curved base rests on your wrist.
Removal is even easier – simply pull upwards on either side, and the deployant springs open.

The leaf spring design, formed of 316L stainless steel, also maintains its strength through repeated, relentless usage, not to mention hold its own against sea water and rain.
Before we begin...
Since this is probably your first time, we'll go through some basics and preparation. The cutting process is but a simple 3-step process. Say it with me:
- Test;
- Cut; and
- Check.
The rubber straps you’ll be receiving will be a standard, maximum length. You’ll just have to cut where needed. But before we do all that, let’s make sure we’re on the same page with the different parts of the strap, and also what tools you’ll need for the job.
The Goods:


- Main body
- Quick-release Spring Bars
- Cut-to-Size Segments ("CTS Segment")
- Deployant Clasp
Tools you’ll need:
- A soft surface to place your watch and other items down. A mousepad will do nicely, or a valet tray.
- A pair of scissors, or a box cutter. If using the latter, do remember a cutting surface, like a clean chopping board, or a crafter’s cutting mat.
- A thin tool to depress spring bars. A single-prong on a spring bar tool, or a tooth pick will get it done.
- Your watch, with its existing strap removed.

How to Cut to Size
Let’s get to it! Here's a quick video running you through all the steps. Scroll down further for a pictorial guide which you can refer to while performing the actual cutting.
Once again, lets recap the 3 simple steps:
- Test the straps against your wrist;
- Cut the necessary number of Segments on either/both sides;
- Check if the strap fits.
Step one: Test
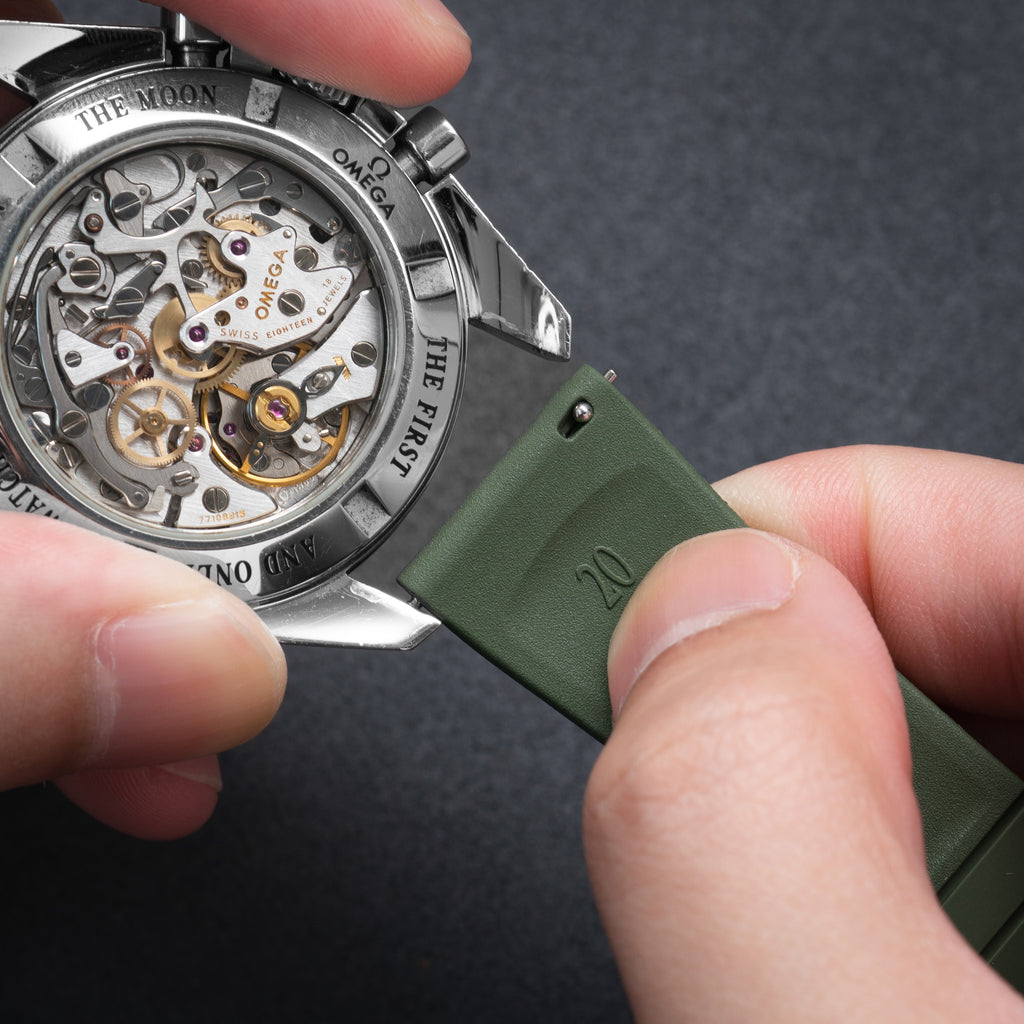
First, install the straps on your watch. The quick-release mechanism should make quick work of that.
Next, place your watch face down on the soft surface, and place the top of your wrist against the case, palm facing up. Pull the straps up and over your wrist, overlapping them. Do it gently! Your wrist shouldn’t feel tugged or pulled at. This method will keep the watch centralised.
As the deployant clasp holds the rubber ends quite close together, our aim is to cut just enough – such that the clasp sits snugly, (but not too tightly!) in the center of your wrist.
 The strap ends almost meet under the deployant
Remember to proceed cautiously. To do this, we cut close to where we need it, but not quite all the way. We can always cut again later! Count the number of holes you need to leave on each side, in relation to the CENTER of your wrist.
In the picture below, for example, it is likely you need to cut along the red dashed line for both straps. However, we would advise that you leave one segment more than you think you need, when doing your first cut, i.e. cut along the yellow dashed lines instead.

At this juncture, you may note that you are most likely not cutting the same number of segments for both sides, even though the deployant is a butterfly style. This is completely normal. Human wrists are not symmetrical, and often require different lengths of strap on either side of the watch.
Step two: Cut!
Make the initial cuts, and remember to cut along the groove! There’s nothing more to it. Count twice, cut once. If you’re unsure, cut one Segment at a time.

Cut along the groove.
Step three: Check!
Time to install the deployant, and do our first check! Place each side of the strap down and install the included spring bars. Take care that the deployant is facing the correct direction (i.e. towards your watch/wrist). If you're using the latest version of the clasp, do remember to install it in the hole furthest inside the clasp.


Place spring bar in the final hole. Install the strap onto the clasp, noting the direction of the strap and clasp. The spring bar should fall in with a click.
Place the watch on your wrist, and close the deployant (shown here again, for your convenience). If this is your first time, do it slow so you don’t risk pinching yourself on the leaf spring.
How’d it go? It is likely to be a little loose on this first attempt, but that only means you’re on the right track. Test and check the fit: shake your wrist, adjust the watch, hold the watch to your wrist, and flip your hand over to check the centralisation.
Repeat!
All you need to do from now is to repeat the process. If it is too far skewed on one side, simply cut the other side only, one Segment at a time.
Complete...
That’s all there is to it! We hope you will enjoy your new strap for the years to come.

One example of a snug, comfortable fit.
What to be aware of (Common Issues)
Now, we very much understand that this will be a completely new and perhaps frightful experience for some, after all, each cut made is permanent.
We’ve compiled some possible mistakes, and negative examples of what the end-result looks and feels like, so that you may avoid them:
1. Overly tight - the clasp shows an excessive gap, and the strap pulls on the wrist. This happens when the user has cut too many segments away, often by mistakenly cutting too far on the first try.

**Disclaimer: We do note that some of you do prefer a very snug fit, so don’t be afraid if you do see a slight gap between two sides. This is normal and does not affect the mechanism’s security.
2. Clasp not centralised on wrist - this may happen if you try to cut each side to an equal length in one go. This is not advisable as explained above, due to wrists not being symmetrical.

Frequently Asked Questions
-
What if I cut more than I should have?
You can rest assured that if you follow the instructions above, there is very little chance that your experience will go wrong. If you do require an additional piece, do reach out to us.
-
Must I cut the same number of segments on either side? The strap seems to fit even when I cut different numbers on each side.
No, you don’t! Wrists come in a variety of shapes and widths, and this means that straps may actually need to be uneven in order for the butterfly-style clasp to sit comfortably on your wrist.
-
After cutting, is there any way to adjust it for another watch?
If your package contains 3 straps (only for the Regular Rubber CTS straps), you can use the spare strap for this purpose. Typically, a different length is needed for one side of the straps if the lug-to-lug distance is different. All you need to do is take one of the existing sides which also works for you on the new watch, and trim the spare.
This may admittedly be difficult if the lug-to-lug distance varies by a significant amount. For example, a Cartier Tank Large has a 19mm lug width, with a 33.7mm lug-to-lug distance. On the other hand, a Grand Seiko SBGH267 with the same 19mm lug width features a 47.4mm lug-to-lug distance. The disparity of 13.7mm (almost half an inch!) would place the butterfly deployant in a very different position on one's wrist. In this case, we would recommend purchasing a second set.
-
Will you be releasing more colours in future?
Hopefully, yes! If there's a strong demand from the community for more colours, we will be happy to produce a wider variety too. If you do have suggestions on what colours we should add next, please let us know and we will look into it!
**We will not be releasing any other colours apart from the five listed on the only production run of the Cartier Santos de Cartier Rubber CTS straps.
-
Can I place a custom order using the same rubber on this strap?
No, rubber straps are not available for custom order, as these straps are made via injection molding, which require the use of specialised molds.
-
Can I buy the clasp separately? What if I want to change clasp colours between watches?
You can buy the clasps separately. Do note however that the clasp is designed to work only with our rubber CTS straps. Do also make sure to check the width you need - the clasps come in 16mm and 18mm widths.
-
Will the clasp cause any issues for those of us with more hair?
It is unlikely that the clasp will cause any issues, we've tested this ourselves! However, as with any metal mechanisms near skin, we advise taking some care while wearing the strap not to pinch yourself by accident.
-
How do I care for the rubber strap?
The FKM rubber is chemically stable, and is highly resistant to the elements. If it does happen to require cleaning, running it under water and cleaning with a cloth should do the trick!
-
Can I wear the strap to swim?
Definitely! Both the strap and the clasp are largely made of materials which do well in water, and even sea-water. However, we offer no guarantees as to the viability of your particular timepiece in water. As with any metal, prolonged exposure to water may cause issues, so we would advise drying and cleaning your watch and strap after any water activity.
-
What if my watch requires a larger diameter spring bar? (e.g. some Seiko divers, etc)
Do indicate via the checkbox above during purchase to indicate if you will require the larger spring bar, and we will swap it out for your use! Do check out our article here for more information on whether you need this spring bar or not.
You may also remove the existing spring bar (link here on how to do it), and use your own OEM spring bars, to ensure that there's an even more secure fit with your watch.
As always, once the strap is mounted on the watch, do give it a few good tugs to make sure that the strap is properly installed, and that it won't accidentally fall off.
-
Will the strap suffer from “case rub”, commonly seen in watches with short lug arms?
We’ve seen no issues so far, do let us know if you do come across such instances in your experience. If you are considering curved lugs to combat this issue, do see our articles on curved lugs here, and yes our rubber strap can accommodate our quick-release curved spring bars.
-
Can I use these straps with a watch that requires curved lugs?
Yes! While the strap does not come with curved lugs by default, the strap is able to accept our curved, quick-release spring bars, which you can purchase here. Here's a guide on how to perform the simple spring bar conversion: Converting Regular Straps to Curved Straps. Do note however that since the strap is not designed specifically for curved lugs, there may be a slight shortening of the strap's width once a curved spring bar is installed (e.g. 20mm may seem closer to ~19.5mm).
Check out a full review done on fitting the CTS strap on curved spring bars!

-
How does the clasp work? Does it have any magnetic or other harmful parts that may damage my watch?
The clasp relies on the deflection of a long metal bar built into the center of the clasp whenever the two wings are pulled open or shut. This solid bar provides security and rigidity when the clasp is shut, and the longevity for repeated use. There are no magnetic parts whatsoever that could risk harm to your mechanical movements!

![Anthracite Hook Strap [kollokium x Delugs] - Image 2](http://delugs.com/cdn/shop/files/20250919-A7405309_298x298_crop_center.jpg?v=1761299094)
![Delugs Anthracite Hook Strap [kollokium x Delugs] Fabric Watch Strap](http://delugs.com/cdn/shop/files/Kollokium_straps_Anthracite_1_298x298_crop_center.jpg?v=1761299094)